どーも譲です。
今回は、賢威7.0のテンプレートに大きめの
SNSアイコンを設置する方法について解説です。
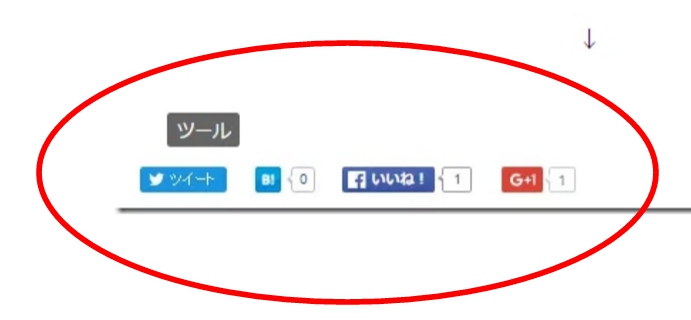
デフォルトのSNSボタンだとちょっと小さいですよね?
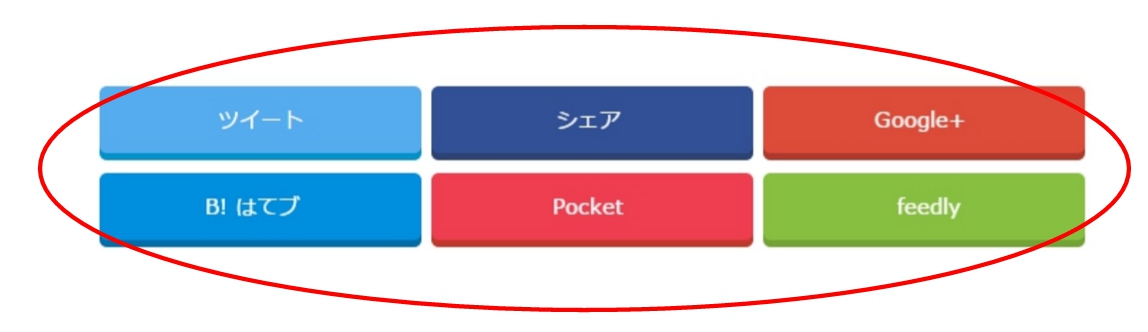
そこで、今回は少し大きめのかっこいいSNSを。
こんな感じのいいですよね?
SNSカスタマイズ設定方法
1.Social Buttonのソースコード編集
まずは、【 外観 】 → 【 テーマの編集 】 → 【 social-button2.php 】
もともとある 【 social-button2.php 】の中身は全部削除しても大丈夫です。
つぎに下記にあるソースコードをコピーして貼り付けましょう。
<div class="sns-wrap">
    <?php
        if( function_exists( "enqueue_font_awesome") ):
             add_action( 'wp_enqueue_scripts', 'enqueue_font_awesome' );
             function enqueue_font_awesome() {
                 wp_enqueue_style( 'font-awesome', '//maxcdn.bootstrapcdn.com/font-awesome/latest/css/font-awesome.min.css' );
             }
         endif;
     $url_encode = urlencode( get_permalink() );
     $title_encode = urlencode( get_the_title() );
     $twitter_account = '【Twitterのアカウント名】';
     ?>
     <ul class="sns clearfix">
         <li class="twitter">
             <a href="http://twitter.com/intent/tweet?url=<?php echo $url_encode; ?>&text=<?php echo $title_encode . urlencode( ' | ' ); echo urlencode( get_bloginfo('name')); ?>&via=<?php echo $twitter_account; ?>&tw_p=tweetbutton&related="<?php echo $twitter_account; ?>" onclick="javascript:window.open(this.href, '', 'menubar=no,toolbar=no,resizable=yes,scrollbars=yes,height=600,width=600');return false;"><i class="fa fa-twitter"></i><span class="pc">ツイート</span></a>
         </li>
         <li class="facebook">
             <a href="http://www.facebook.com/sharer.php?src=bm&u=<?php echo $url_encode;?>&t=<?php echo $title_encode;?>" onclick="javascript:window.open(this.href, '', 'menubar=no,toolbar=no,resizable=yes,scrollbars=yes,height=600,width=600');return false;"><i class="fa fa-facebook"></i><span class="pc">シェア</span><span class="share-count"><?php if(function_exists('get_scc_facebook')) { echo scc_get_share_facebook();}?></span></a>
         </li>
         <li class="googleplus">
             <a href="https://plus.google.com/share?url=<?php echo $url_encode;?>" onclick="javascript:window.open(this.href, '', 'menubar=no,toolbar=no,resizable=yes,scrollbars=yes,height=600,width=600');return false;"><i class="fa fa-google-plus"></i><span class="pc">Google+</span><span class="share-count"><?php if(function_exists('get_scc_gplus')) { echo scc_get_share_gplus();}?></span></a>
         </li>
         <li class="hatebu">
             <a href="http://b.hatena.ne.jp/add?mode=confirm&url=<?php echo $url_encode ?>" onclick="javascript:window.open(this.href, '', 'menubar=no,toolbar=no,resizable=yes,scrollbars=yes,height=600,width=600');return false;"><span class="hatena-icon">B!</span><span class="pc">はてブ</span><span class="share-count"><?php if(function_exists('get_scc_hatebu')) { echo scc_get_share_hatebu();}?></span></a>
         </li>
         <li class="pocket">
             <a class="no-deco" target="_blank" href="http://getpocket.com/edit?url=<?php echo $url_encode; ?>&title=<?php echo $title_encode; ?>" onclick="javascript:window.open(this.href, '', 'menubar=no,toolbar=no,resizable=yes,scrollbars=yes,height=600,width=600');return false;"><i class="fa fa-get-pocket"></i><span class="pc">Pocket</span><span class="share-count"><?php if(function_exists('scc_get_share_pocket')) echo scc_get_share_pocket(); ?></span></a>
         </li>
         <li class="feedly">
             <a href="http://feedly.com/i/subscription/feed/<?php bloginfo('rss2_url'); ?>" rel="nofollow" target="_blank"><i class="fa fa-rss"></i>feedly  <?php if(function_exists('scc_get_follow_feedly')) echo (scc_get_follow_feedly()==0)?'':scc_get_follow_feedly(); ?></a>
         </li>
     </ul>
 </div>
2. base.cssの編集
social-button2.phpのソースコード編集が
終わりましたら、次に 【 base.css 】 の編集になります。
【 外観 】 → 【 テーマの編集 】 → 【 base.css 】を表示します。
【 base.css 】 を表示させて一番下に下記のソースコードを貼りつけます。
/* ----------------------------------------------------
 SNSボタン
-----------------------------------------------------*/
.sns-wrap {
    width: 100%;
    margin-top: 1em;
    margin-bottom: 1%;
}

.sns {
    margin: 0 auto;
    list-style: none;
}

.sns a {
    text-decoration: none;
    font-size: 15px;
}

.sns {
    text-align: center;
}

.sns li {
    float: left;
    width: 32.3%;
    margin: 0 .5% 2%;
}

.sns a {
    position: relative;
    display: block;
    padding: 10px 5px;
    color: #fff;
    border-radius: 5px;
    text-align: center;
}

.sns span,
.sns .fa {
    margin-right: .4em;
    color: #fff;
}

.sns li a:hover {
    -webkit-transform: translate3d(0px,5px,1px);
    -moz-transform: translate3d(0px,5px,1px);
    transform: translate3d(0px,5px,1px);
    box-shadow: none;
}

.sns .twitter a {
    background: #55acee;
    box-shadow: 0 5px 0 #0092ca;
}

.sns .facebook a {
    background: #315096;
    box-shadow: 0 5px 0 #2c4373;
}

.sns .googleplus a {
    background: #dd4b39;
    box-shadow: 0 5px 0 #ad3a2d;
}

.sns .hatebu a {
    background: #008fde;
    box-shadow: 0 5px 0 #016DA9;
}

.sns .pocket a {
    background: #f03e51;
    box-shadow: 0 5px 0 #c0392b;
}

.sns .feedly a {
    background: #87c040;
    box-shadow: 0 5px 0 #74a436;
}

@media only screen and ( max-width: 736px ) {
    .sns li {
        width: 32.3%;
        margin: 0 .5% 4%;
    }

    .sns a {
        font-size: 13px;
        padding: 6px 3px;
    }
}
基本的にはこれで大丈夫です。
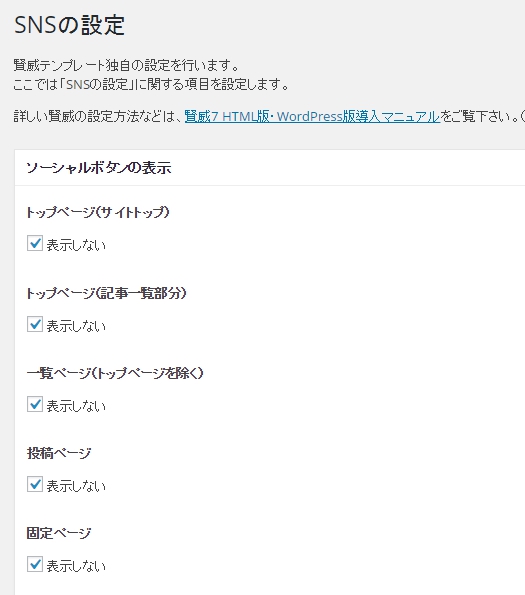
これでSNSアイコンが表示されない場合は、
賢威の設定をしなければなりません。
ダッシュボードから
【 賢威の設定 】 → 【 SNS の設定 】 を選択します。
SNS の設定画面が表示されますので、
ソーシャルボタンの表示で表示させたい項目の
選択をはずしましょう。
これで、大きめのかっこいいSNSアイコンが表示されます。